A Simple Cell Phone Signal Booster Installation Guide

Cell phone signal booster are designed to amplify your 5G and 4G LTE signals to improve your cell reception and eliminate dropped phone calls. Proper installation ensures you receive the best cell signal coverage in your home, office, or vehicle. On the other hand, improper installation will negatively affect your coverage area and uplink power.
The installation process consists of multiple simple steps. Let's take a look at how to install a home, car, and RV cell phone signal booster.
Take advantage of our system design and installation services. Learn more or call us for a free consultation: 1-800-969-8189.
How to Install a Home Signal Booster
Installing a home cell phone booster is not a difficult task, you don’t have to be a professional cellular signal booster installer to get the job done.
If you decide to go the DIY route, you will need a few tools: a ladder, your smartphone, a Phillips-head screwdriver, and an adjustable wrench.
Step 1: Find the Best Cellular Signal Outside your Home
Cell phone signal boosters, also known as repeaters and extenders, utilize an outdoor antenna to grab the existing weak signal. Its location can affect the strength of the signal that is being transmitted. Therefore, you will want the antenna to be located in an area with the strongest signal. So, before installing the antenna, it’s extremely important to find the area with the best signal.
Test the outside signal by walking around your home and using:
- Your phone’s signal bars: The side of your home that provides the most bars will be the area where you should install the antenna. However, it's important to note that even though phone bars are a good way to see signal strength, they are subjective measurements. One bar for Verizon, 3 for AT&T, and 2 for T-Mobile. This happens because there is no standard on the level of signal strength each bar represents.
-
dBm measurements: Using dBm measurements will provide you with the most accurate signal strength readings. Mobile signal can range from -50 to -120 dBm, with -50 dBm representing full bars and -120 dBm representing no signal. The side of your home that gives you the highest dBm measurement will be where you want to install your antenna. You can see your dBm measurement through the setting of your Android device or the Field Test Mode menu on iPhone's.
Finding dB Readings on Your Phone
For iPhone:
- Make sure you are not connected to WiFi or a Hotspot → Dial *3001#12345#* → Press the Call Button → Field Test Menu will Appear → Drag Down Notifications Bar → dBm reading will be displayed on the left-hand corner
For Android:
- Go to Settings → About Phone → Network or Status → SIM Card Status → Signal Strength
Step 2: Installing the Outside Antenna
The outdoor antenna (also known as a donor antenna) should be installed as high as possible, ideally on the roof of your house. Doing so will improve the antenna's line of sight with the cell phone tower, as well as reduce the number of obstacles between the antenna and the tower that can degrade the signal.
You can use a mounting pole, a vent pipe, or fascia to mount the antenna. This is where the ladder, Philips-head screwdriver, and adjustable wrench will come in handy. It’s recommended to place the antenna on or near the edge of the roof. If you’re using a directional antenna, such as a yagi antenna, make sure to point it away from your roof and in the direction of the nearest cell tower provided by your carrier. There is no need to aim an omnidirectional antenna.
In situations where installing the antenna on the roof is impractical, you can mount it in the attic, on a wall, or near a window facing the cell tower. Keep in mind that the added obstructions can degrade the signal the antenna will be receiving. As a result, the amplifier will be receiving less signal, which can reduce the coverage area.
Step 3: Connecting the Outdoor Antenna to the Amplifier
After the antenna has been installed, connect the coaxial cable that was included in the box to the antenna and run it inside your home. This can be done in multiple ways:
- Drilling a hole into your house
- Following your satellite TV antenna cable and running the coax cable alongside it and into your house
- Running the cable through a vent
- Use a flat window entry cable and run it underneath the window
Whichever method you decide to use, it’s recommended to put a drip loop in your cable before it enters the house. A drip loop is a low point or a loop on the cable forcing the water to drip off and preventing it from entering your home. Once the cable is inside, connect it to the signal amplifier.
Step 4: Installing the Inside Antenna
Ideally, the inside antenna should be installed in or near the area where you are experiencing connectivity issues. Cell phone signal booster kits can consist of different types of indoor antennas:
- Dome Antenna: This antenna is ceiling mounted and will distribute a signal in a 360-degree angle.
- Panel Antenna: Usually, this antenna is wall-mounted, but it can also be ceiling mounted (make sure it’s facing down). Panel antennas distribute a single in a 45 to 70-degree angle, meaning the signal will be strongest in the areas closest to it.
- Desktop Antenna: These antennas can be placed on any flat surface. Some booster kits, like the weBoost Home Room, consist of a stand-alone desktop antenna, while others, like the SureCall Flare 4G 3.0, or HiBoost Home 4K Plus, feature a 2-in-1 amplifier/antenna combo.
When installing the inside antenna, make sure there is at least a distance of 20 feet vertical or 50 feet horizontal between the outside and inside antennas to prevent oscillation, which will cause the booster to shut down. After placing the antenna in the area where you need a better signal, connect the coaxial cable that was included in the box to the antenna and the amplifier (excluding amplifier/antenna combos).
Step 5: Power On
To complete the cell phone signal booster installation process, connect the power cord to the amplifier and a wall outlet. It will take a few seconds for the booster to configure itself. Once it’s done, the green lights on the booster mark the end of poor reception and dropped calls.
If at any point in time you wanted to adjust the equipment’s location or troubleshoot the amplifier, simply unplug the power cord, and plug it back in after a few seconds. Similar to how you would restart a router to reset your wireless signal.
Alternative: Professionally Installed Cell Signal Boosters
If the idea of installing a signal booster in your home or small business has you down, we offer a number of signal boosters which include professional installation as a part of the package.
weBoost Installed Home Complete - 474445
Buy this Cell Phone Signal Booster If:
- You want to have your booster professionally installed.
- You live in a large home with strong outdoor signal and want whole home coverage.
- You live in a midsize home with weak outdoor signal and want whole home coverage.
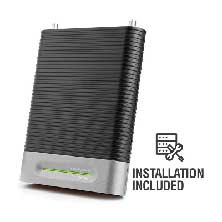
The weBoost Installed Home Complete is made to cover an entire home. It comes with free professional installation in virtually every zip code in the country. It can cover a large home with decent outside signal or a midsize home with weak outdoor signal. It can give up to 7,500 square feet of coverage with perfect outside signal. Most people will probably see a coverage area of between 3,500 and 5,500 square feet. If you want to cover more than one floor, you should buy more antennas. If you live in a very weak signal rural area you might get about 2,000 square feet of coverage from it.
The weBoost Installed Home Complete is the only cellular amplifier we have that comes with free installation right now. If you do not think you can install a signal booster, buy this one.
The installation is only available for residential buildings. For commercial buildings, check out the WilsonPro line, and the weBoost Office 300 Installed.
weBoost Office 300 Installed
Buy this Cell Phone Signal Booster If:
- You have a large office or commercial space.
- You want total carrier coverage in your business.
- You want a booster that's professionally installed.
The weBoost Office 300 Installed is a commercial-grade booster for small to medium businesses. It can cover up to 15,000 square feet under best conditions, and comes with professional installation by OnTech.
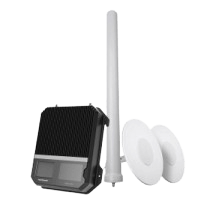
Equipped with a high-gain omnidirectional outdoor antenna and two low-profile indoor antennas, it offers incredible reach to distant cell towers and wider coverage. Whether your business is in the city or the countryside, the weBoost Office 300 Installed ensures reliable connectivity through your office building or in key areas.
Commercial Installation Services
In addition to WilsonPro installation, our nationwide team also offers Nextivity Cel-Fi installation.
How to Install a Car Signal Booster
Installing a vehicle signal booster is fast and simple. You won't be needing any tools.
Step 1: Installing the Amplifier
The amplifier can be placed anywhere in your vehicle, as long as it's properly ventilated. Most people place the amplifier under a seat, but it can also be mounted to a seat.
Step 2: Installing the Outside Antenna
Most vehicle boosters feature a magnetic mount antenna, making them extremely easy to set up on a car, truck, or SUV. Simply place the external antenna on the roof of your vehicle, and voila.
For optimal performance, the antenna should be at least 6 inches away from any windows and at least 1 foot away from any other antennas on your vehicle's roof. Run the cable below a door's weather seal and connect it to the amplifier.
Note for new Ford owners or other cars made of aluminum: The antenna will not magnetically attach to an aluminum roof. You'll need to use stickem to attach the outside antenna.
Step 3: Installing the Inside Antenna
Low-profile antennas are the most common in-vehicle antennas. They can easily be Velcroed vertically or horizontally to the dashboard or a seat. Cradle antennas, on the other hand, are installed on your vehicle's air vent. Regardless of which antenna your booster uses, it must be installed at least 8 inches away from any person.
After the antenna has been installed, connect the antenna's cable to the amplifier.
Step 4: Power On
To complete the vehicle booster’s installation, connect the DC power supply to the booster and the auxiliary power outlet. It will take a few seconds for the booster to configure itself. Once it’s done, if all the lights are green, you’re good to go.
How to Install an RV Signal Booster
Installing an RV signal booster is not hard. The most difficult step is installing the outside antenna. You'll be needing a Phillips-head screwdriver and an adjustable wrench.
Step 1: Installing the Amplifier
The amplifier can be placed anywhere in your RV, as long as it's properly ventilated and close to a power outlet. It can be mounted on a wall, placed on a counter, or inside a cabinet.
Step 2: Installing the Outside Antenna
RV outside antennas need to be securely mounted on the roof. It can be easily attached to the RV’s ladder or railing support post.
Most RV boosters use omni antennas. For optimal results, mount the antenna vertically, do not mount it horizontally or at an angle. Doing so will degrade the booster’s performance.
Similar to a home booster, the higher you can get the antenna the better. This will improve the line of sight between the antenna and the cell tower, as well as reduce the number of cell phone signal blocking material. Just make sure the antenna is below the maximum height allowed in your state.
Step 3: Connecting the Outdoor Antenna to the Amplifier
After the external antenna has been installed, connect the coaxial cable that was included in the box to the antenna and run it inside the RV. This can be done by drilling a hole on the roof or wall and weatherproofing it later, or rerouting the cable through an existing entry point. After connecting the cable to the booster, make sure to secure the cable outside with cable clips or cable tie mounts.
Step 4: Installing the Inside Antenna
The inside antenna should be installed in the area where you wish to improve your cell signal. RV boosters, like the HiBoost Travel 4G 2.0 RV LTE and the weBoost Drive Reach RV, utilize desktop antennas to improve the signal indoors, while others, like the Cel-Fi Go+ and the SureCall Fusion2Go 3.0 RV 4G, use low-profile antennas or inside whip antennas.
- Desktop antennas are extremely easy to set up. Simply place the antenna on any flat surface.
- Low-profile antennas can easily be Velcroed vertically or horizontally to the dashboard or a seat.
- Inside whip antenna connects directly to the amplifier. For optimal results, make sure it’s in an upright position.
After placing the antenna in the area where you wish to improve your signal, connect the antenna's cable to the amplifier (excluding the inside whip antenna).
Step 5: Power On
To complete the RV booster’s installation, connect the AC/DC power supply to the booster and the auxiliary power outlet or wall outlet. It will take a few seconds for the booster to configure itself. Once it’s done, if all the lights are green, you’re good to go.
Contact Us
Signal Boosters is a leading provider of FCC-approved cell phone signal boosters for homes, vehicles, and commercial buildings. We believe everyone should enjoy great cell phone signal. That is our goal.
We provide lifetime support and 2-3 year warranty on all of our signal boosters. Call us, and we will assist with any issues you might be experiencing with poor cell service. Contact us today, or call us at 1-800-470-6777.
Interested in Learning More? Check Out Our Cellular Info Hub / WiFi Info Hub


