A Simple Cell Phone Signal Booster Installation Guide
Why Proper Cell Signal Booster Installation Matters
Cell phone signal boosters amplify weak 5G and 4G LTE signals to improve reception and eliminate dropped calls. However, the equipment is only as good as its installation. When positioned correctly, a signal booster system delivers the best possible coverage based on your unique signal environment.
Poor installation creates the opposite effect: reduced coverage and potential system shutdowns due to antenna interference. The difference between a successful installation and a frustrating one often comes down to following the right steps.
This guide walks you through the complete installation process, ensuring you get maximum performance from your home signal booster from day one.
Take advantage of our system design and installation services. Learn more or call us for a free consultation: 1-800-969-8189.
How to Install a Home Signal Booster
Installing a home cell phone booster is a project most people can do themselves. You don’t need to be a professional installer, but you do need patience and attention to detail, plus a ladder, your smartphone, a Phillips-head screwdriver, and an adjustable wrench. Whether you are setting up a weBoost, SureCall, Cel-Fi, HiBoost, or another brand, the installation steps are fairly similar.
We recommend starting with a soft installation. This means temporarily setting up your booster system without permanently mounting the components. A soft install allows you to test signal strength, make adjustments, and confirm everything is working properly before securing cables and hardware in place. Once you’re satisfied with the performance, you can secure all components.
Step 1: Mount the Outdoor Antenna
The outdoor antenna (also called a donor antenna) is responsible for capturing the existing cell signal outside your home. Its location and orientation (based on antenna type) are the most important factors in how well your booster will perform. Ideally, it should be mounted where it can receive the strongest cell signals.
How to Find the Best Spot for Your Antenna
To identify the best spot, we recommend measuring signal strength in dBm as signal bars are subjective. Signal strength ranges from about -50 dBm (excellent) to -120 dBm (no service). Both Android and iPhone devices have settings that display dBm readings.
Test signal strength outside your home to see what area yields the best results. That will be the most optimal sport for your antenna. Typically, it will be on the roof where the antenna has the clearest line of sight to nearby cell towers with the least amount of obstructions.
Finding dB Readings on Your Phone
For iPhone:
Make sure you are not connected to WiFi or a Hotspot → Dial *3001#12345#* → Press the Call Button → Field Test Dashboard will Appear → Look for your RSRP value
For Android:
Go to Settings → About Phone → Network or Status → SIM Card Status → Signal Strength
Omnidirectional vs Directional Antenna Setup
If using an omnidirectional antenna, setup is simple. These antennas capture cellular signals from all directions. All you have to do is mount it where you determined it would receive the stronger signal. No special orientation required.
For directional antennas, which are included in most home cell phone booster kits, a little more patience is needed. These antennas send and receive cellular signals from a specific direction. To work effectively, the antenna needs to be aimed towards your nearest cell tower. You can use our cell tower locator tool to identify the right direction.
Mounting Options
You can mount the outdoor antenna in several ways, depending on your home’s layout. The roof or fascia is the most common and effective location since it usually provides the clearest line of sight. A vent pipe is another simple and secure option. If an existing mast or suitable mounting spot is not available, a pole mount kit can help get the job done.
For apartments or homes where roof access isn’t possible, some boosters, such as the Signal Boosters Apartment Amplifier or the SureCall EZ 4G, allow you to place the donor antenna on a window that faces the nearest tower, though performance may be reduced if obstructions are in the way.
Important Considerations:
- Always use caution on ladders or roofs. If roof access is difficult, consider hiring a professional.
- Mount the antenna where the signal is the strongest.
- Directional antennas must point toward your desired carrier’s tower for best results.
Step 2: Route Outside Antenna Coax Cable Inside
After the antenna has been installed, connect the coaxial cable that was included in the box to the antenna and run it inside your home. This can be done in several ways
- Drilling a hole into your house
- Following your satellite TV antenna cable and running the coax cable alongside it and into your house
- Running the cable through a vent
- Use a flat window entry cable and run it underneath a window
Whichever method you decide to use, it’s recommended to put a drip loop in your cable before it enters the house. A drip loop is a low point or a loop on the cable that forces water to drip, preventing it from entering your home.
Step 3: Set Up the Inside Antenna
The inside antenna is what broadcasts the boosted signal into your home. It should be placed in the areas where you need the strongest coverage, whether that’s your home office, living room, or basement.
To prevent interference, make sure there’s enough distance between the outdoor and indoor antennas (about 20 feet vertically and 50 feet horizontally, or a combination of both). Without proper separation, the system can experience oscillation, which will cause the booster to operate at reduced power or shut down.
Most home booster kits come with indoor panel antennas. They can be wall-mounted, and some, like the one included with the weBoost Home MultiRoom, allow desktop placement. These are simple to set up and direct signal into specific areas.
Dome antennas are also an option as an add-on. They broadcast signals in all directions and work best in open layouts or large spaces. Ceiling access is required for installation.
Important Considerations:
- Sufficient separation is needed between the antennas to prevent oscillation and ensure your booster delivers the best performance possible.
Step 4: Place Amplifier
The amplifier is the heart of your booster system. It should be placed in a well-ventilated spot within reach of your inside antenna and close to a power source. Aim for about 24 inches of separation between the amplifier and the indoor antenna. This setup minimizes cable runs so the strongest possible signal reaches the inside antenna, resulting in better coverage.
Some amplifiers require wall mounting, while others support desktop placement. If your unit’s amplifier had a built-in antenna, like the SureCall Flare 3.0, or uses a whip antenna, like the weBoost Home Studio, make sure to place the amplifier in the area where you want the greatest signal boost.
Important Considerations:
- Place the amplifier in a well-ventilated area. Good airflow prevents overheating and helps the booster operate at peak performance.
Step 5: Connect Inside Antennas to the Amplifier
With your antennas and amplifier in place, it’s time to connect all components. Attach the coaxial cable from the outdoor antenna to the amplifier’s outdoor antenna port, then connect the cable from the indoor antenna to the indoor antenna port. Make sure the connections are finger-tightened but not overtightened.
Important Considerations:
- Check that each cable is connected to the correct port.
- Avoid sharp bends or kinks in the cables, as these can weaken signal transmission.
- Keep cable runs as short and direct as possible to preserve signal strength.
Step 6: Power the System
Plug the power cord into the amplifier and connect it to a wall outlet. The booster will take a few seconds to power up and configure itself. Once the indicator lights turn green, your system is ready to use, and you should start noticing stronger signal indoors.
If you ever need to adjust the placement of your equipment or troubleshoot the system, unplug the power cord and wait a few seconds before plugging it back in. Restarting the booster works much like rebooting a WiFi router and can often restore proper function.
Do I Need a Lightning Surge Protector?
A lightning surge protector is not required for your cell signal booster to function, but it is highly recommended. Surge protectors (sold separately) safeguard your system from power surges caused by lightning strikes. This helps to ensure long-term performance and protect your investment. This is especially important if you live in an area that has frequent thunderstorms.
How to Install a Lightning Surge Protector
The surge protector should be installed between the outside antenna and the coaxial cable that connects to the amplifier. Once it’s in place, attach a 10-gauge or a 12-gauge grounding wire (depending on your local electrical code) to the surge protector and connect it to the nearest approved grounding point.
View our guide on lightning surge protectors for more information.
Can Home Cell Phone Boosters Be Professionally Installed?
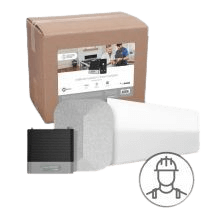
Some home cell phone boosters, like the weBoost Home Complete Installed, come with professional installation included.

Powerful home cell phone booster with professional installation.
Learn MoreIn most cases, however, booster kits are designed for self-installation. While the process can be a little time-consuming, it is very DIY-friendly. Every kit includes a step-by-step installation manual, and many manufacturers now offer companion apps to simplify setup. These apps provide tools to measure signal strength, locate nearby towers, and guide you through the installation process.
- weBoost App for weBoost units
- Cel-Fi WAVE App for Nextivity units
- SureCall App for SureCall units
If you run into difficulties or prefer hands-on help, you can always hire a local installer or electrician. This ensures your booster is installed safely and set up for optimal performance.
Installation Instructions for Other Applications
While this guide focuses on home signal booster installation, cell phone boosters can also be used in vehicles, RVs, and commercial buildings.
- How to Install a Car Cell Phone Booster: Installation is quick and tool-free. Most systems use a magnetic roof antenna and a low-profile interior antenna. For step-by-step instructions, see our car signal booster installation guide.
- How to Install an RV Cell Phone Booster: RV booster installations are similar to car systems, but with some antenna mounting differences. We’ll be publishing a full RV installation guide soon, so stay tuned.
- Professional Installation for Commercial Boosters: Larger buildings and office spaces often benefit from custom design and installation. Learn more about our commercial signal booster installation services by contacting us at 1-800-420-3211.
Get the Most from Your Cell Signal Booster
Proper installation is the key to unlocking the full potential of your cell phone booster. From mounting the outdoor antenna in the right spot to ensuring correct spacing between components, each step directly affects your coverage, call clarity, and data speeds.
If you need guidance beyond this guide, our team is here to help. Contact us today for personalized assistance, product recommendations, or professional installation options tailored to your home or business. Call us at 1-800-470-6777 and we’ll make sure you get the best possible performance from your booster.
Interested in Learning More? Check Out Our Cellular Info Hub / WiFi Info Hub


