Read Featured Reviews From Actual Customers Read All Reviews
Professional Signal.
Affordable Price.
The SureCall Fusion Professional is a pro grade signal booster at a consumer price. If you suffer from dropped calls, slow data, and unsent texts, the SureCall Fusion Professional will fix your problems. It boosts your signal, giving you reliable coverage throughout your large home or office up to 8,000 sq ft under best conditions. It works for any US carrier and any phone, including iPhone or Android.


Total Compatibility for any Phone, Network, or Signal Environment
The SureCall Fusion Professional will boost across any cellular network, no matter where you are. Rural, suburban, urban – as long as you have any signal outside, you’ll get it even stronger inside. The exclusive, built-in SureIQ technology balances incoming signal, ensuring consistent uptime and peak performance no matter the signal environment.
Cover up to 8,000 sq ft* with crisp, clear cellular signal. Boosts voice and 4G LTE data signals on 5G phones and devices.
* Effective coverage area depends on quality of outside signal and internal building materials.
Cutting Edge Signal Boosting Technology
Optimized for weak signal areas – unique 2XP technology delivers twice the signal power of its nearest competitors, ensuring complete connectivity in weak areas. Customizable dials allow focus on most important signal bands for your home or office.


Do It Yourself – Just the Way You Like It
The SureCall Fusion Professional is extremely customizable, with numerous added antennas and accessories which allow it to fit any building design. Everything you need for a basic installation is included in the kit, but expansions are available as needed. Customize your kit, customize your life, and enjoy great signal no matter your building’s layout.
For the Whole Family and Workplace
No more complaints. Reliable signal throughout your home or office at all times. Perfect for creating a parallel network, so it’s business as usual if your WiFi goes down.
No monthly fees. No WiFi needed. Just fantastic cell signal.

Stay connected with the SureCall Fusion Professional, the most powerful cell phone signal booster for mid-size buildings that provides strong, reliable connections in areas up to 8,000 sq. ft. It significantly improves voice, text, 4G and LTE data speeds for all North American cell carriers with built-in 2XP technology that doubles uplink transmission power to maintain the cellular connection to the tower in the weakest signal environments.
With SureIQ signal monitoring, the Fusion Professional cell phone booster prevents signal overload and keeps you connected through thick and thin.
Assembled and tested in the USA with outstanding build quality, award-winning technologies, all-carrier compatibility, and world-class support, the Fusion Professional is the premier cell phone signal booster for mid-size commercial buildings and large residences at a stupendous price point.
- Boosts 4G & 5G LTE for any home or office up to 8,000 sq ft.
- Works for all phones & cellular devices, all US & Canadian carriers.
- Complete kit: all parts included. Expansion kits available for future proofing.
- No monthly fees, no need to be connected to wifi, it just works.
- SureCoverage Guaranteed: Better signal or 60-days money back & 3 year warranty
- Those who live in a large home with strong outside signal and want whole home coverage.
- Those who live in a midsize home with weak outside signal and want whole home coverage.
- Those who have a large office with strong outside signal and have capacity concerns.
- Those who have a midsize office with weak outside signal and have capacity concerns.
- With proper installation, you can expect a significant increase in indoor signal (anywhere from 1-4 bars). If you do not find that, you can take advantage of our 60-day return policy.
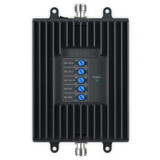
- SureCall Fusion Professional Booster
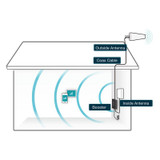
- Outside Yagi Directional Antenna
- SC-400 50 ft Cable
- Inside Panel Antenna
- SC-240 20 ft Cable
| SureCall Fusion Professional | |
|---|---|
| SKU | SC-FusionPro |
| Uplink Frequency Range (MHz) |
698–716 776–787 824-849 1850–1915 1710–1755 |
| Downlink Frequency Range (MHz) | 728–746 746–757 869–894 1930–1995 2110–2155 |
| Supported Standards | CDMA, WCDMA, GSM, EDGE, HSPA+, EVDO, LTE and all cellular standards |
| Impedance | 50 Ohm donor port / 50 Ohm server port |
| Maximum Gain: | Cellular - 65 dB PCS - 72 dB LTE(A) - 63.5 dB LTE(V) - 64 dB AWS - 71 dB |
| Noise Figure | 8 dB |
| VSWR | ≤2.0 |
| Max Uplink Power | 26.0 dBm |
| Maximum Output Power | 1 Watt EIRP |
| Cable | SC-400 / SC-240 |
| RF Connectors | N Female donor port / N Female server port |
| AC Power Transmitter | Input AC 110V, 60 Hz; Output DC 5-15V |
| Power Consumption | <15W |
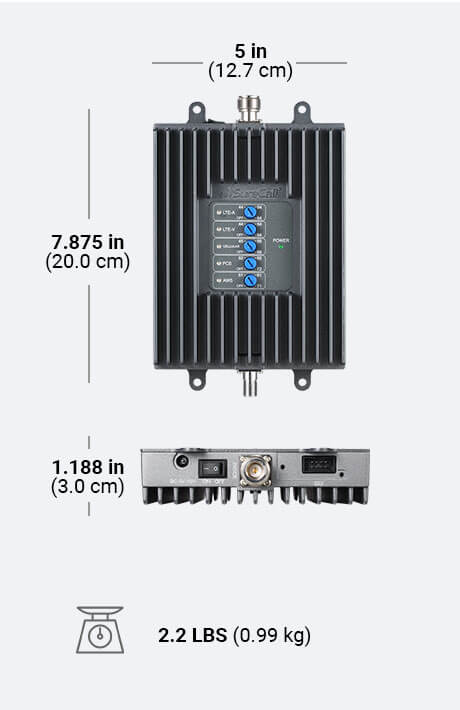
| Dimensions | 7.875 x 5 x 1.188 inches |
| Weight | |
| Weight | 2 lb 3 oz |
| FCC NOTICE | This is a CONSUMER device. BEFORE USE, you MUST REGISTER THIS DEVICE with your wireless provider and have your provider's consent. Most wireless providers consent to the use of signal boosters. Some providers may not consent to the use of this device on their network. If you are unsure, contact your provider. You MUST operate this device with approved antennas and cables as specified by the manufacturer. Antennas MUST be installed at least 20 cm (8 inches) from any person. You MUST cease operating this device immediately if requested by FCC or a licensed wireless service provider. |
| WARNING: California's Proposition 65 | This product can expose you to chemicals including Nickel (Metallic) which is known to the State of California to cause cancer and Bisphenol A (BPA) which is known to the State of California to cause birth defects or other reproductive harm. For more information go to https://www.p65warnings.ca.gov/. |
Installing any consumer signal booster setup is fairly simple, but can be a pain. The results, however, are worth it.
You’ll need some general handyman skills but nothing too specialized. If you prefer having someone else do the job, you can also contact your local general contractor, electrician, or anyone who's installed a satellite TV dish.
-
1. Find The Best Outside Signal:
Begin by finding the best signal outside your building. This is done by walking around the perimeter of your building and either using the number of bars on your phone (ok method), smartphone apps (good method), or Field Test Mode (great method) to find the best location. Pro tip: Locating the side of your building getting the best signal is the MOST CRUCIAL step of the installation process. -
2. Install Outside Antenna
The area with the best signal is where you will mount the outside antenna. Place the antenna as high up as possible, ideally on the roof, although the fascia or gable is acceptable. It's important that the outside antenna should be on or near the edge of the roof pointing away from the house to the cell tower and NOT pointing across the roof since it may cause interference with the inside antenna. Point the outside antenna at your nearest cell tower. -
3. Connect to Amplifier
Once the outside antenna is mounted, connect the included coaxial cable to the outside antenna and to the "outside antenna" port on the amplifier. Some run cable into the attic, others prefer using the window-entry cable. It's all a matter of preference and aesthetics and where you want to locate the amplifier. Pro tip: The amplifier does all the heavy lifting for boosting signal and will get warm. Keep it in a well-ventilated area. -
4. Install Inside Antenna
Once the cable is connected to the "Outside Antenna" port of the amplifier, do the same for the "Inside Antenna" port. Some prefer having the antenna mounted on the ceiling, others prefer the wall. Again, it's all a matter of preference, and use case. If you have a panel antenna, they generally perform best on the wall, and if you have a dome antenna, they usually perform best on the ceiling. If you have multiple antennas, you will need to use a splitter to divide the cable runs, and then place each antenna where you'd like them. Pro tip: Having enough separation between the two antennas prevents oscillation. Make sure there is at least 20 feet vertical or 50 feet horizontal distance between the two. -
5. Power on
Plug in the power supply to the Amplifier and to the wall outlet. The amplifier will sync up and if you see all green lights, then green means GO! Check to see near the inside antenna how much better signal you're getting. Pro tip: Any post-installation adjustments like relocating the outside antenna will require rebooting the amplifier. Simply unplug the power supply for 5-10 seconds and replug to reboot the system. -
Technical Support & Troubleshooting
If you need help setting up your amplifier system and troubleshooting support: our trained product specialists can assist. Just call us at 1-800-470-6777 or email sales@signalboosters.com


